Github pages is an automated service that hosts your website for free and provides an url. That's what is used to host Chisai! We will activate it, but we also need to use github actions to rebuild the website when a change is detected.
Once those two steps are done, you will never have to think about it again!
How does that work
Your website is a big folder of text files that need to be transformed into a website. To do this, we have to detect when a change is made and trigger an automated command so the transformation happens.
That's when Github Action comes in. Github actions is a tool to automate things by using configuration files. It will build your website for you each time you edit it and put it in what is called a branch.
But building the website is not enough to be able to see it. We then have to host the website. Since we don't want to pay for the hosting and do everything in Github, we will activate Github Pages, a free hosting service provided by Github.
Let´s go!
Github Actions
Activate github actions
When you forked Chisai you also recovered the configuration file, now all there is to do is activate it.
In the main menu, click on Actions. If it's your first time using them, you will see this:
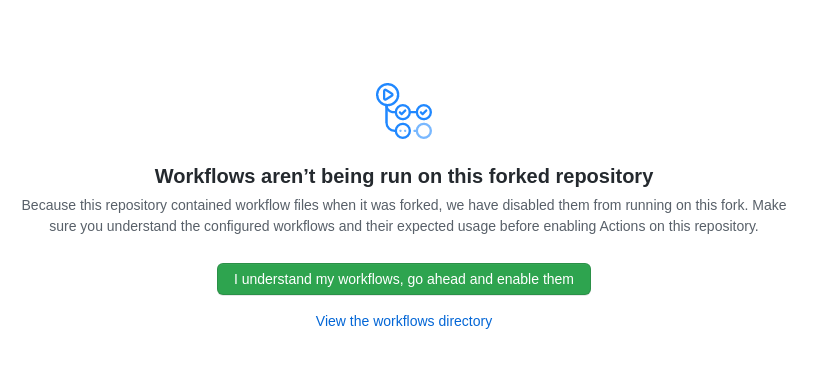
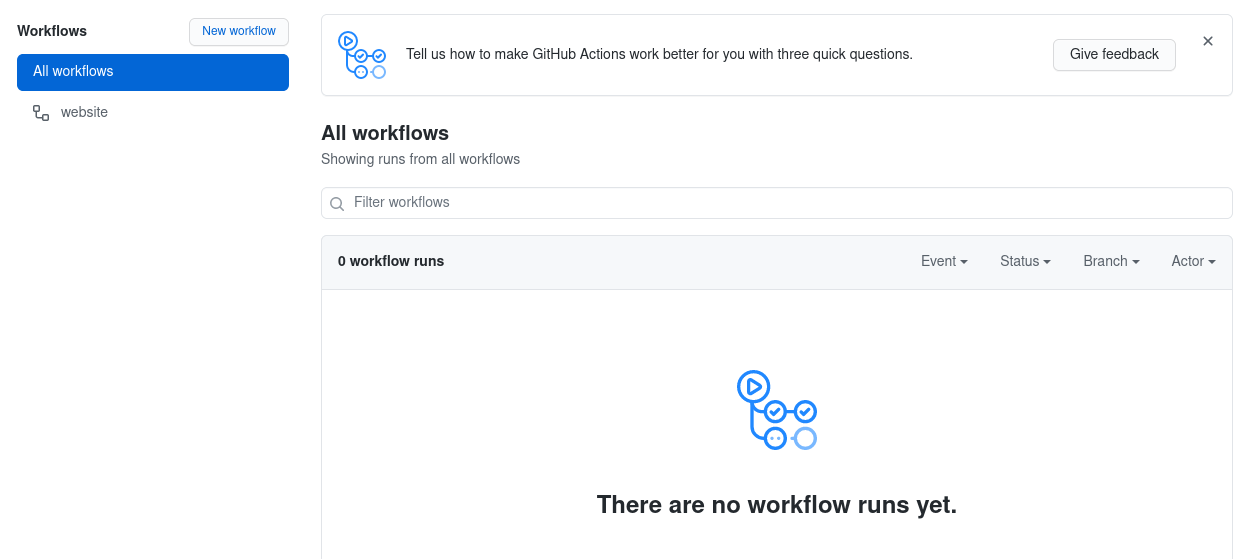
Click on the big "I understand" button. You will then see this screen:
Set the permissions
Another thing we need to do is set Read and Write permissions for the github actions. To do this, click on the Settings in the main menu, then select Actions -> General in the left menu. Scroll to the bottom and set the Read and Write permissions as followed:
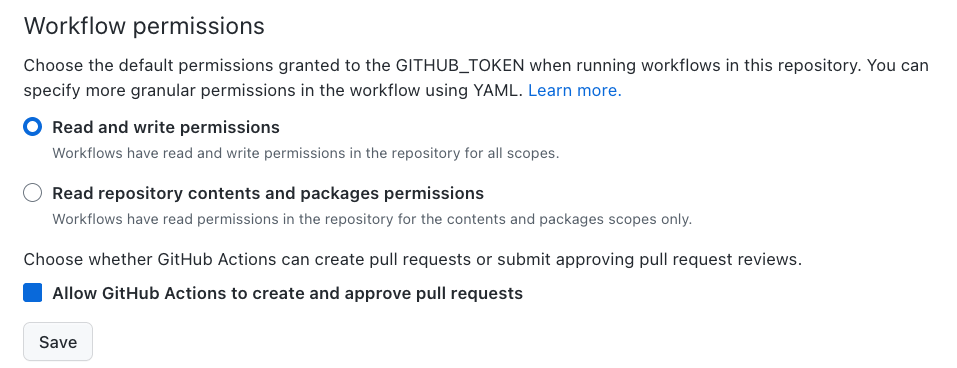
And... that's all for the automation. The next time you edit a file, the action will be launched and the site rebuilt.
Github Pages
Create the gh-pages branch
This part is probably going to be the most esoteric if you are not a programmer, so stay calm and try to follow the steps!
When you are ready to show your website to the world, go on the home page of the repository. You will see right above the list of files a button with Master or Main written on it. It's the branch name we are using, and you don't really need to know much about it except we need to create one with a specific name.
Click on Master or Main and you will see a field. In this field, enter gh-pages. Then click right below on "Create branch...".
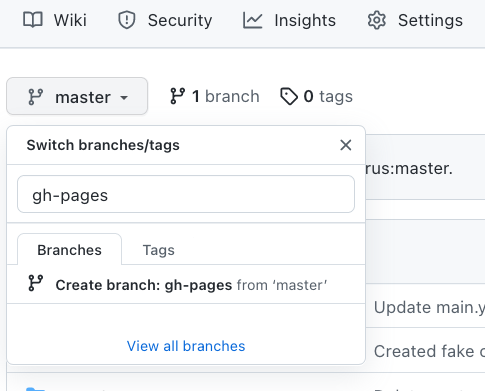
Your browser will reload the page, and you will notice that instead of Master or Main, it's now written gh-pages. Under it, you will also see a message saying something like This branch is XX commits ahead, X commits behind Thomasorus:gh-pages. and a Sync fork button on the right of the message. Click it to show a sub-menu with two buttons. It should look like this:
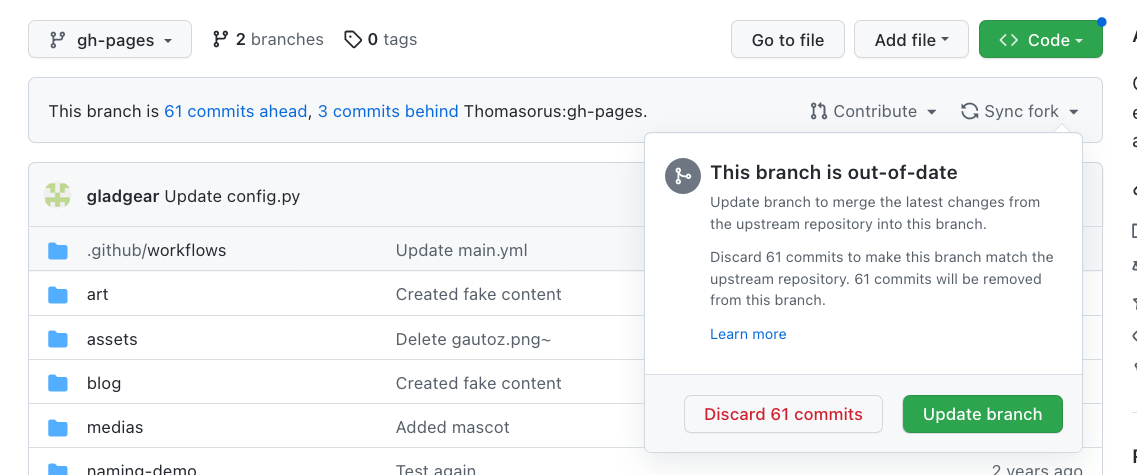
Click on the Discard XX commits. The browser will once again reload the page, and you are now seeing different files. It's the example website files, and that's what we want for now. In the future, after you modify your website, the built website files that are served to your readers will be located here, in gh-pages.
Activate Github Pages
Now that we have a "location" to store our website, we can activate the hosting! Click on Settings in the menu at the top of the page. On the left menu, you will see one named "Pages", click it.
In Source, select Deploy from branch and in Branch select gh-pages, then click save. It should look like this:
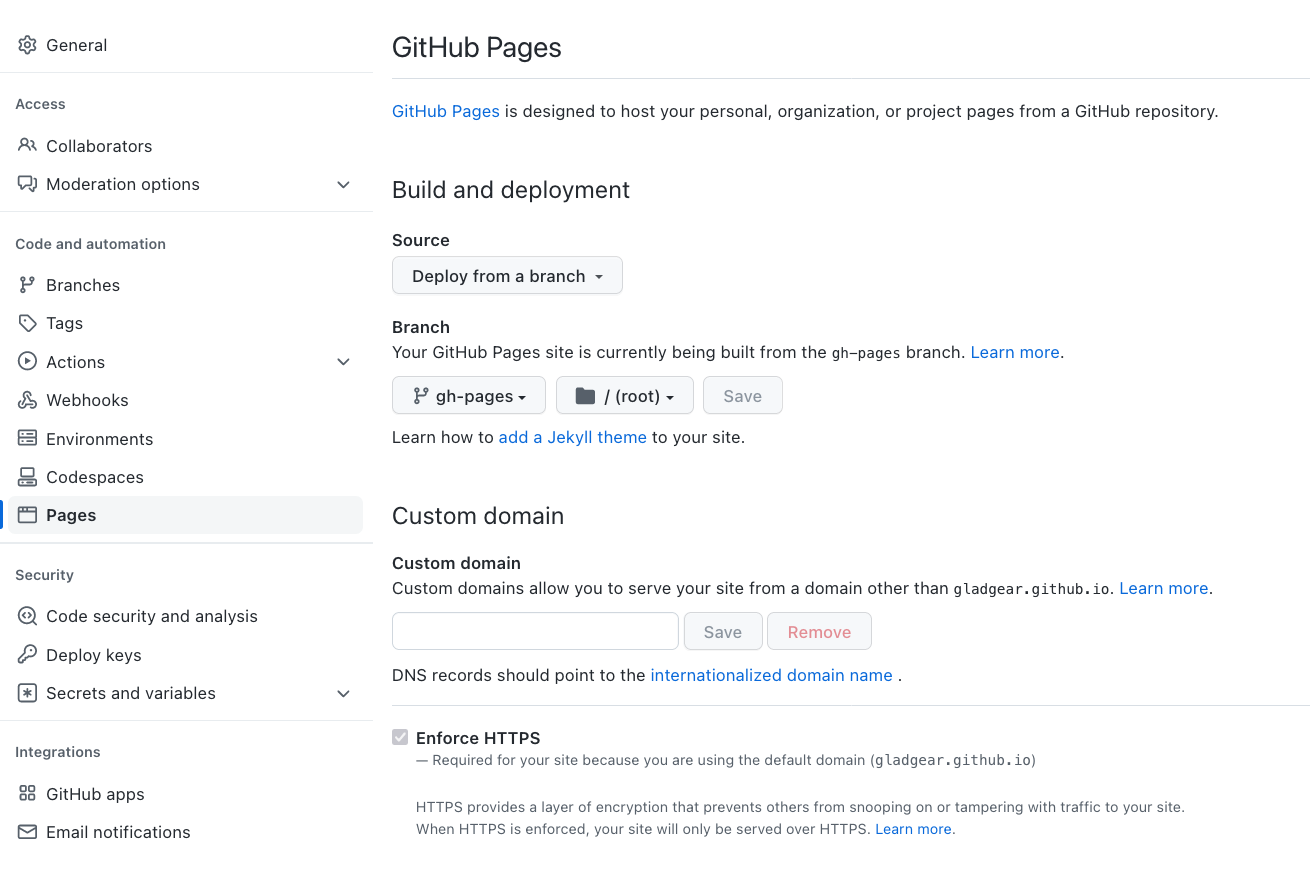
After a few minutes your hosting will be ready and if you refresh the page, you will see the url:
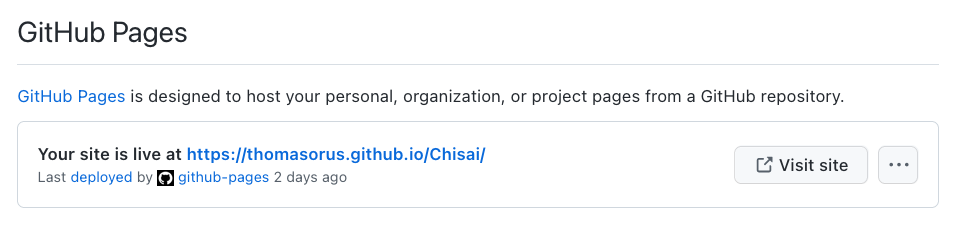
If you are seeing the Chisai demo website instead of your own content, it may be because you haven't yet modified a file in your website and the demo is still used. Try to modify or create a new page, for example by customizing the favicon.